|
|
||
|
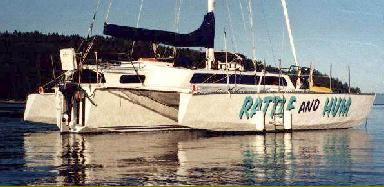
VENTILATION SYSTEM FOR SEARUNNERS
Having lived, sailed, and sold boats in the Pacific Northwest USA and British Columbia coast of Canada, I learned a universal truth. Boats in these waters get mold and mildew every winter. If your boat is tied to a dock, on a hook or under cover on the hard, you will have a big job in the spring getting the mildew off the cabin top, walls and out of the nooks and crannies of your boat. Many people try light bulbs, heating units, etc. but to no avail. Come spring time, mold and mildew is there in varying degrees. While building my boat I knew I would be faced with this
problem when I launched her and had to spend winters on the water.
There had to be a way to prevent stagnant air inside the boat, the main
cause of excess moisture and mildew growth. Yes, you can leave a hatch
open or a window open and hope the muskrats or seals don't get in, now
that is a mess. But even with the hatch open, it doesn't do anything
for the area under the bunk, under the floors or behind the stove,
cupboards, etc. There had to be a way.
While doing some work under the wing deck one day, I noticed that the float got wider towards the middle of the boat, the main hull got wider towards the middle of the boat and the wind deck got deeper towards the middle of the boat. These three parts of the boat, working together with the surface of the water that would soon be underneath her, formed a venturi under the wing deck. A venturi causes airflow to increase in speed and therefore causes a suction. Now if I put a hole in the venturi area, I should be able to suck the air out of the boat. I could ventilate the boat by wind power alone. I would not need any electric fans, solar powered fans, or anything else to remove the stale air from the boat interior. When a boat sits to a mooring, it always faces into the wind. My Searunner venturi ventilator would always work. When the wind changes, the boat changes direction along with the wind and the venturi still works. And wow!, if this were true, when we were sailing at 10 knots, there would be so much suction we might have to nail down any loose objects in the cabins. All small children and pets will have to wear safety harnesses inside the boat. Well, as usual, my active imagination was working overtime. The actual increase in wind speed under the wing deck was not as much as I thought it would be, but there was promise. Maybe I could help things along and still have my no power ventilation system. To increase the suction under the wing decks, I covered the holes in the bottom of the wing deck with backward facing, 90-degree PVC elbows. I measured the outside diameter of the elbows, drilled a hole to accept that size and epoxied the elbow into the hole. I used standard 2-inch PVC elbows. Elbows used for 2-inch diameter PVC pipe, are available at any Home Depot or the like. Boy, that sure increased the airflow. I was impressed.
But you know, something bothered me. I have left an open
hole, under my wing deck that leads to the inside of my boat. Could
water somehow get in here? Pour water on the deck. It all runs down the
deck and off the back of the boat. That's OK. How about a big wave
entering the tunnel from the front, between the main hull and the
float? Well, if that happened, there is no problem because the elbows
are facing the back of the boat so water will be blocked by the front
of the elbow. But what about a large following wave entering the tunnel
from the back? Not good…there are a lot of gaping holes just
waiting to fill with water and then what? I fixed that by installing
plastic valves on the inside of the boat, under the bunk bottoms.
Worried about following seas?- close the valves. Need ventilation?-
open the valves.
Now I had to figure out how to get stale air out of all the little nooks and crannies of the boat. Now this is a Searunner and you know how many nooks and crannies there are. A lot! The first area I tackled was under the bunks. This was simple. I made sure all the bunk bottom supports had holes drilled in them to allow air to flow under the bunks. All the bunk bottoms were drilled full of holes. One-inch holes placed on a 3-inch grid. My bunk bottoms are made out of 3/8 inch Boeing Aircraft honeycomb material and this spacing might not be suitable for ply bunk bottoms. I placed my first elbow near the foot of the berth, as close to the cabin side as possible. I had to leave some room to get the valve in there too. I installed another elbow on the inside of the boat to attach the valve to. I lived on board my boat in the winter in the marina. I slept in my berth every night and used electric heat for the cabin. About twice a week, I raised up my berth mattress for the day. That berth mattress is made from 4-inch high-density latex foam rubber. In five months of winter living I never had a mildew problem with the mattress. Of course, if I was not living on board, I would not have generated any moisture in the mattress. The second elbow under the wing deck was installed close to the first one. But instead of installing the valve on the inside of the boat, I inserted a piece of PVC pipe that ran up the cabin side to the top of the cabin. I had installed footlockers at the foot of the berths so this was a perfect place to hide the end of the pipe and install the valve. This pipe would remove any stale air that gathered in the locker or around the cabin top. The third elbow under the wing deck was installed closer to the main hull, but at the foot of the berth like the others. Inside the boat, I added a 90-degree elbow and a 45-degree elbow and a piece of PVC pipe that went down through the floor of the storage locker under the cockpit floor. This pipe stopped about three inches from the hull bottom. If you have an engine in one of these compartments, this system will remove the fumes and smells normally associated with inboard engines. In that case, you might want to stop your PVC pipe up a little higher.
Now that takes care of one berth and some areas of the boat.
You have three elbows installed under the wing deck, some PVC valves
and pipe installed and your cost was less then a nice supper at the
marina restaurant. Now duplicate the same set up in each berth area. My
boat has one fixed double berth forward, two convertible single/doubles
aft and one nav station forward. There are many berth arrangements in
Searunners, but all have the same main hull, wing deck, cabin side
structure, and that is what you use to mount this ventilation system.
That part of the system removes stale air from under the berths, from in the berths and general cabin area, and from under the floor area. Now if we could just force some air in somewhere, all this would work even better. I found that this system, up to this point would, remove lots of stale air and keep the cabin and under floor area dry in all but the dreariest months. However, those real bad months, January, February, and even March could cause problems still. So to make the system work even then, we had to pressurize one end of the system while making the other end low pressure. Lets start in the front cabin. If you go to the number three bulkhead, the one at the forward end of your dressing room, you will find a nice flat area that is the main hull sides. Go forward of bulkhead number three, about 12 inches and down from the overhead about 6 inches and cut a 4 inch hole in the side of the main hull. Not to worry, this hole will be inside the leading edge of the wing deck and not outside the boat. I would suggest you verify that your boat is built to specs before you cut any holes. Some boats have shorter leading edges the others. Now if you look into the hole, you will see that you have opened up a cavity that is about 36 inches long and about 24 inches front to back. You are going to use this area as a dorade box. I covered this hole with a teak ring that had screen material in the center. |
||